
A Sneak Peek Into The Pantry Design Process (I’m So Excited I Could Cry)

Like most middle-aged lady moms, I get really excited about “pantry potential”. Dreaming of where I can hide the Instant Pot, fantasizing about displaying my Easter platters, thinking about the hours I’ll spend decanting and labeling almond flour. I started cooking seriously 4 years ago, and lockdown really escalated it from a necessity/hobby to a daily activity that truly fulfills me. Most nights I put on my apron and a podcast, shift from work mode to chill mode and try new recipes that my kids will likely complain about. On a good day I cook twice a day, and we hope to entertain small groups of friends every weekend (so I don’t have to ever leave the house), which means that this kitchen needs to function well (duh) and have proper food storage and prep space. Now granted this pantry (this whole renovation) isn’t exactly exactly normal – I fully recognize our privilege and feel so lucky. But regardless of budget hopefully some of the ideas or choices can help you if you are updating your kitchen or simply thinking about your own pantry dreams. And listen, this is my job so I had the extra motivation to make her look really, really pretty. Like the mud room, the pantry is a hard working space and a lot of people have pantry woes (us included). I feel extremely grateful to call this panry design “work”, but please know that you don’t need a pantry like this to be happy 🙂

The pantry lives near the kitchen, obviously, close to the back door (for easy grocery drop) and opens down into the basement (where I’ll store my canned apples, jars of tomatoes and potatoes once my homestead life really takes off :)) I LOVE that it’s very accessible but not visible from the living room because while this pantry will be pretty, she will likely still be messy and full of jerky bags, boxes of broth, goldfish and strewn with coffee grinds. I have a feeling I’ll have pantry pride and treat it with respect, but it’s still life.
The Inspiration


While most rooms in this house will be bright and airy (a holdover from living in CA for 12 years) this room and the family room both had the opportunity to be dark. Not only do I love the idea of that color pulling you in and surprising you, but I think that considering the ‘stuff’ that will be in there, the dark will make it look cooler and almost mask much of the packaging (I hope).
But what about function?
But the thing is that this room needs to work hard, so having everything hidden away, or so deep that things could get hidden wastes its utility. So I went on the hunt for pantries that were within our size that looked really functional. Here’s what I found:

This one functionally really fits the bill. I love the combination of lower cabinets, counter space (this is where our toaster, microwave, and coffee maker will be), and upper easy-to-access open shelving.
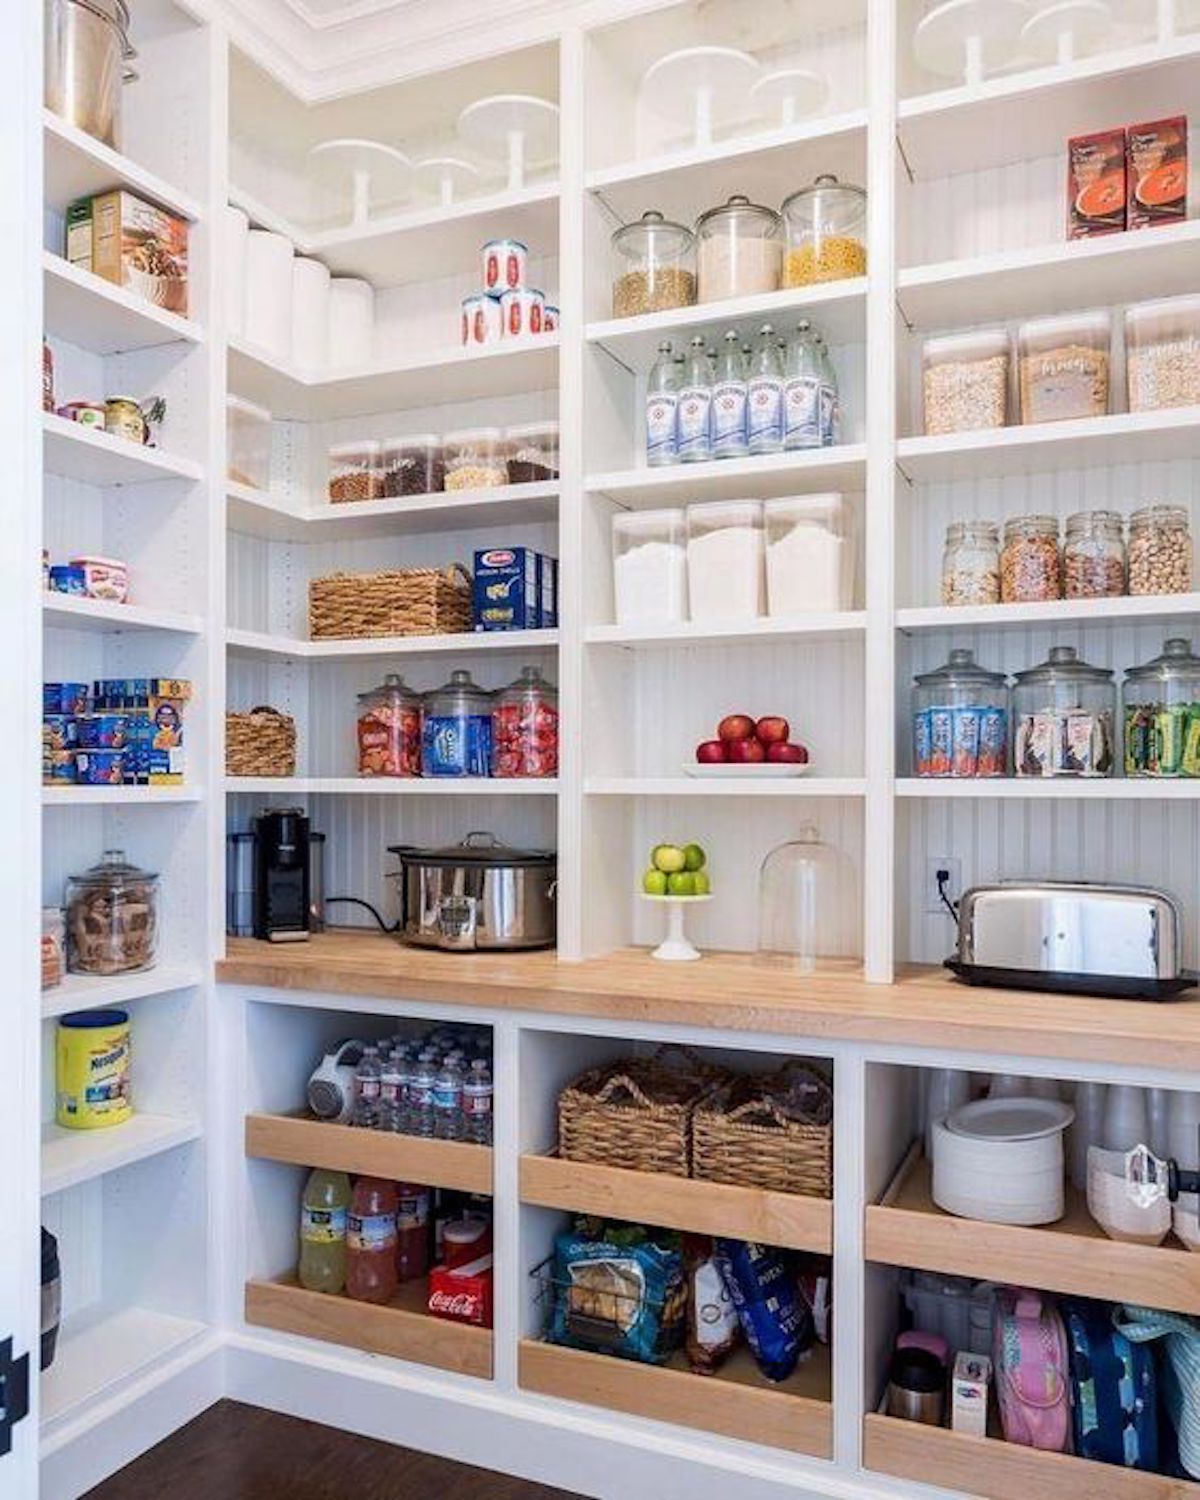
I love how these have pull-out drawers for the lowers – especially for how deep these cabinets are (24″) so you don’t have to try to reach in and find something in the back. We designed ours differently but with the same function.
Our Cabinetry


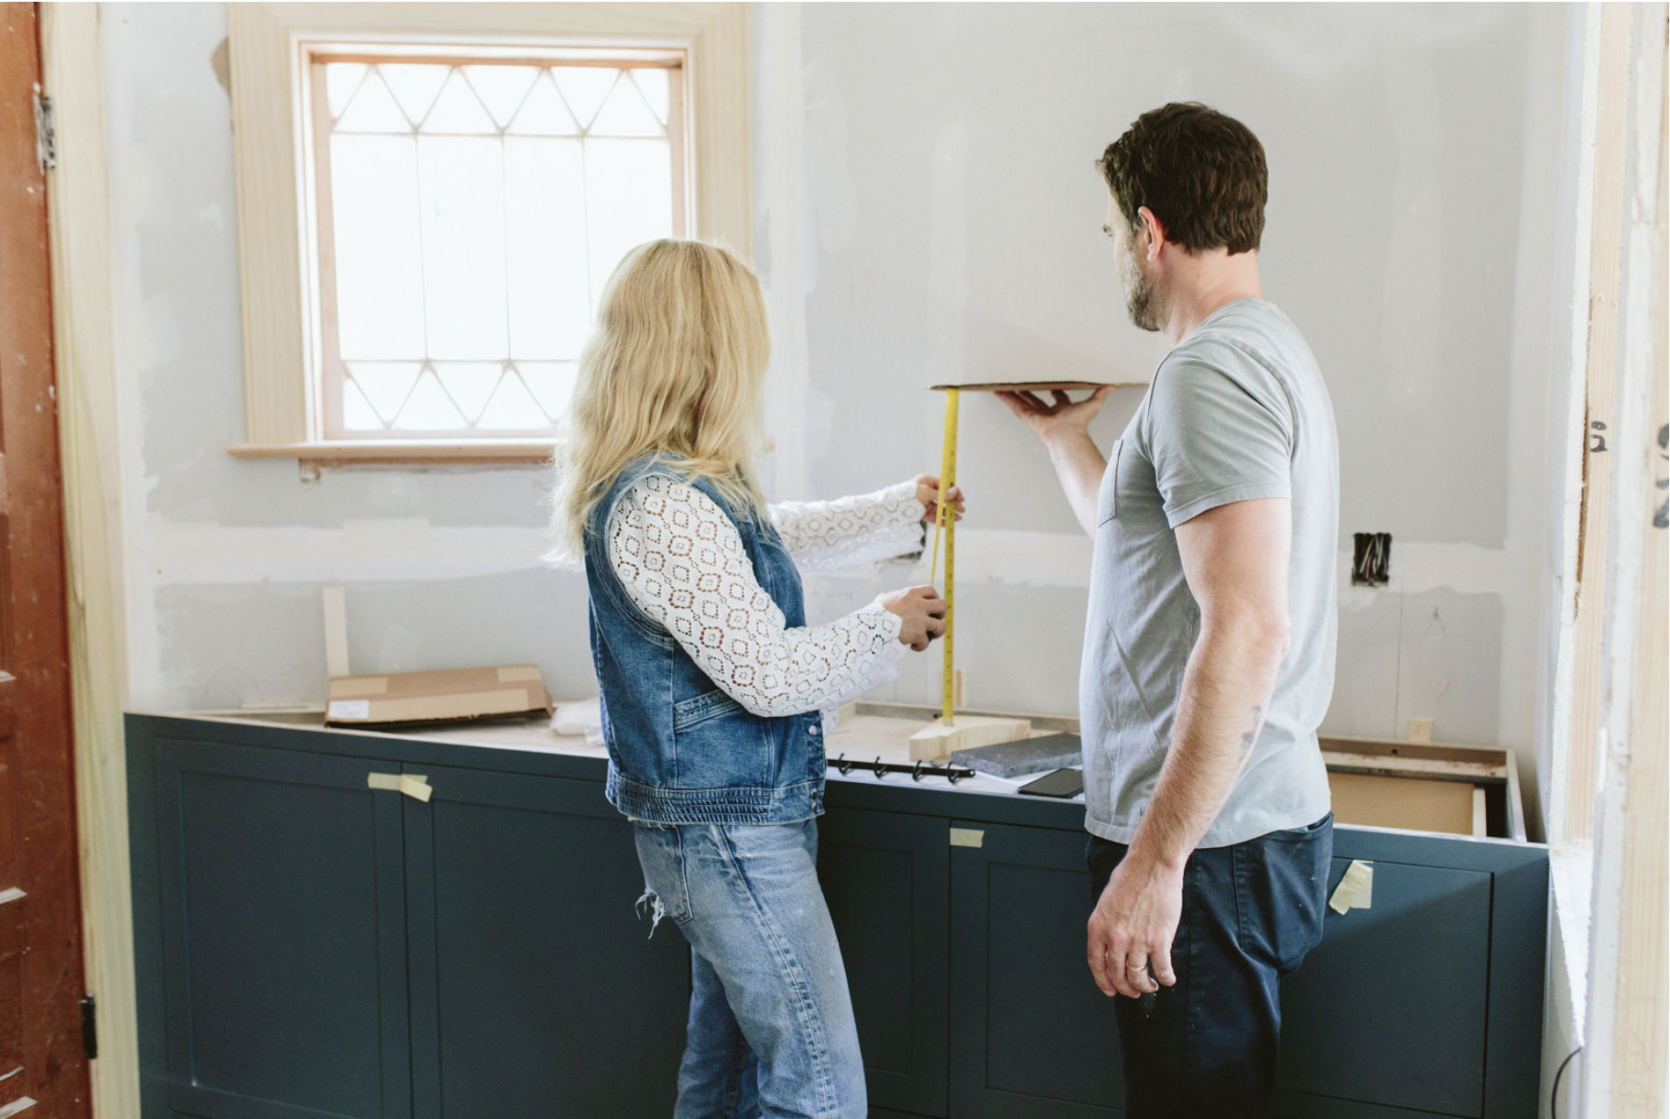
As you can see the shape of the room itself is odd with a triangular corner, so to maximize it we worked with Unique Kitchens & Baths in addition to our kitchen cabinets and utilized every inch (on the bottom). Now we didn’t need to do this (a cute vintage hutch could have been awesome in there), but I’m sure happy we did as they look AWESOME. We chose a dark blue from Sherwin-Williams called Slate Tile and had it painted in a satin finish.
Designing Your Pantry For Your Family


When we designed this we really thought about our family’s needs. What are our biggest ‘pain points’ (hello marketing speak) and what problems do we want to solve? What do we reach for the most and what is the most annoying to deal with? So I’ll show each and point out what is going where:
Coffee/Toaster and Microwave Area – The “Morning Wall”

This side will be for all things “morning” – coffee for us and breakfast items for the kids. They are in charge of their own breakfast so we designed it to be easy for them to do – i.e. the cereal boxes in the lower cabinet and the toaster on the countertop. The microwave is hidden inside the cabinet and the doors retract back as they did at our mountain house coffee station and bar. The drawer underneath it is for bread, bagels, and packets of oatmeal. The far-right has two deep drawers for bagged kids’ snacks – chips/crackers on top and jerky/dried fruits and nuts on the bottom. These kids have ZERO excuses to not make themselves their own breakfast or pack their own dry snacks.
General Food Storage and Appliance Wall
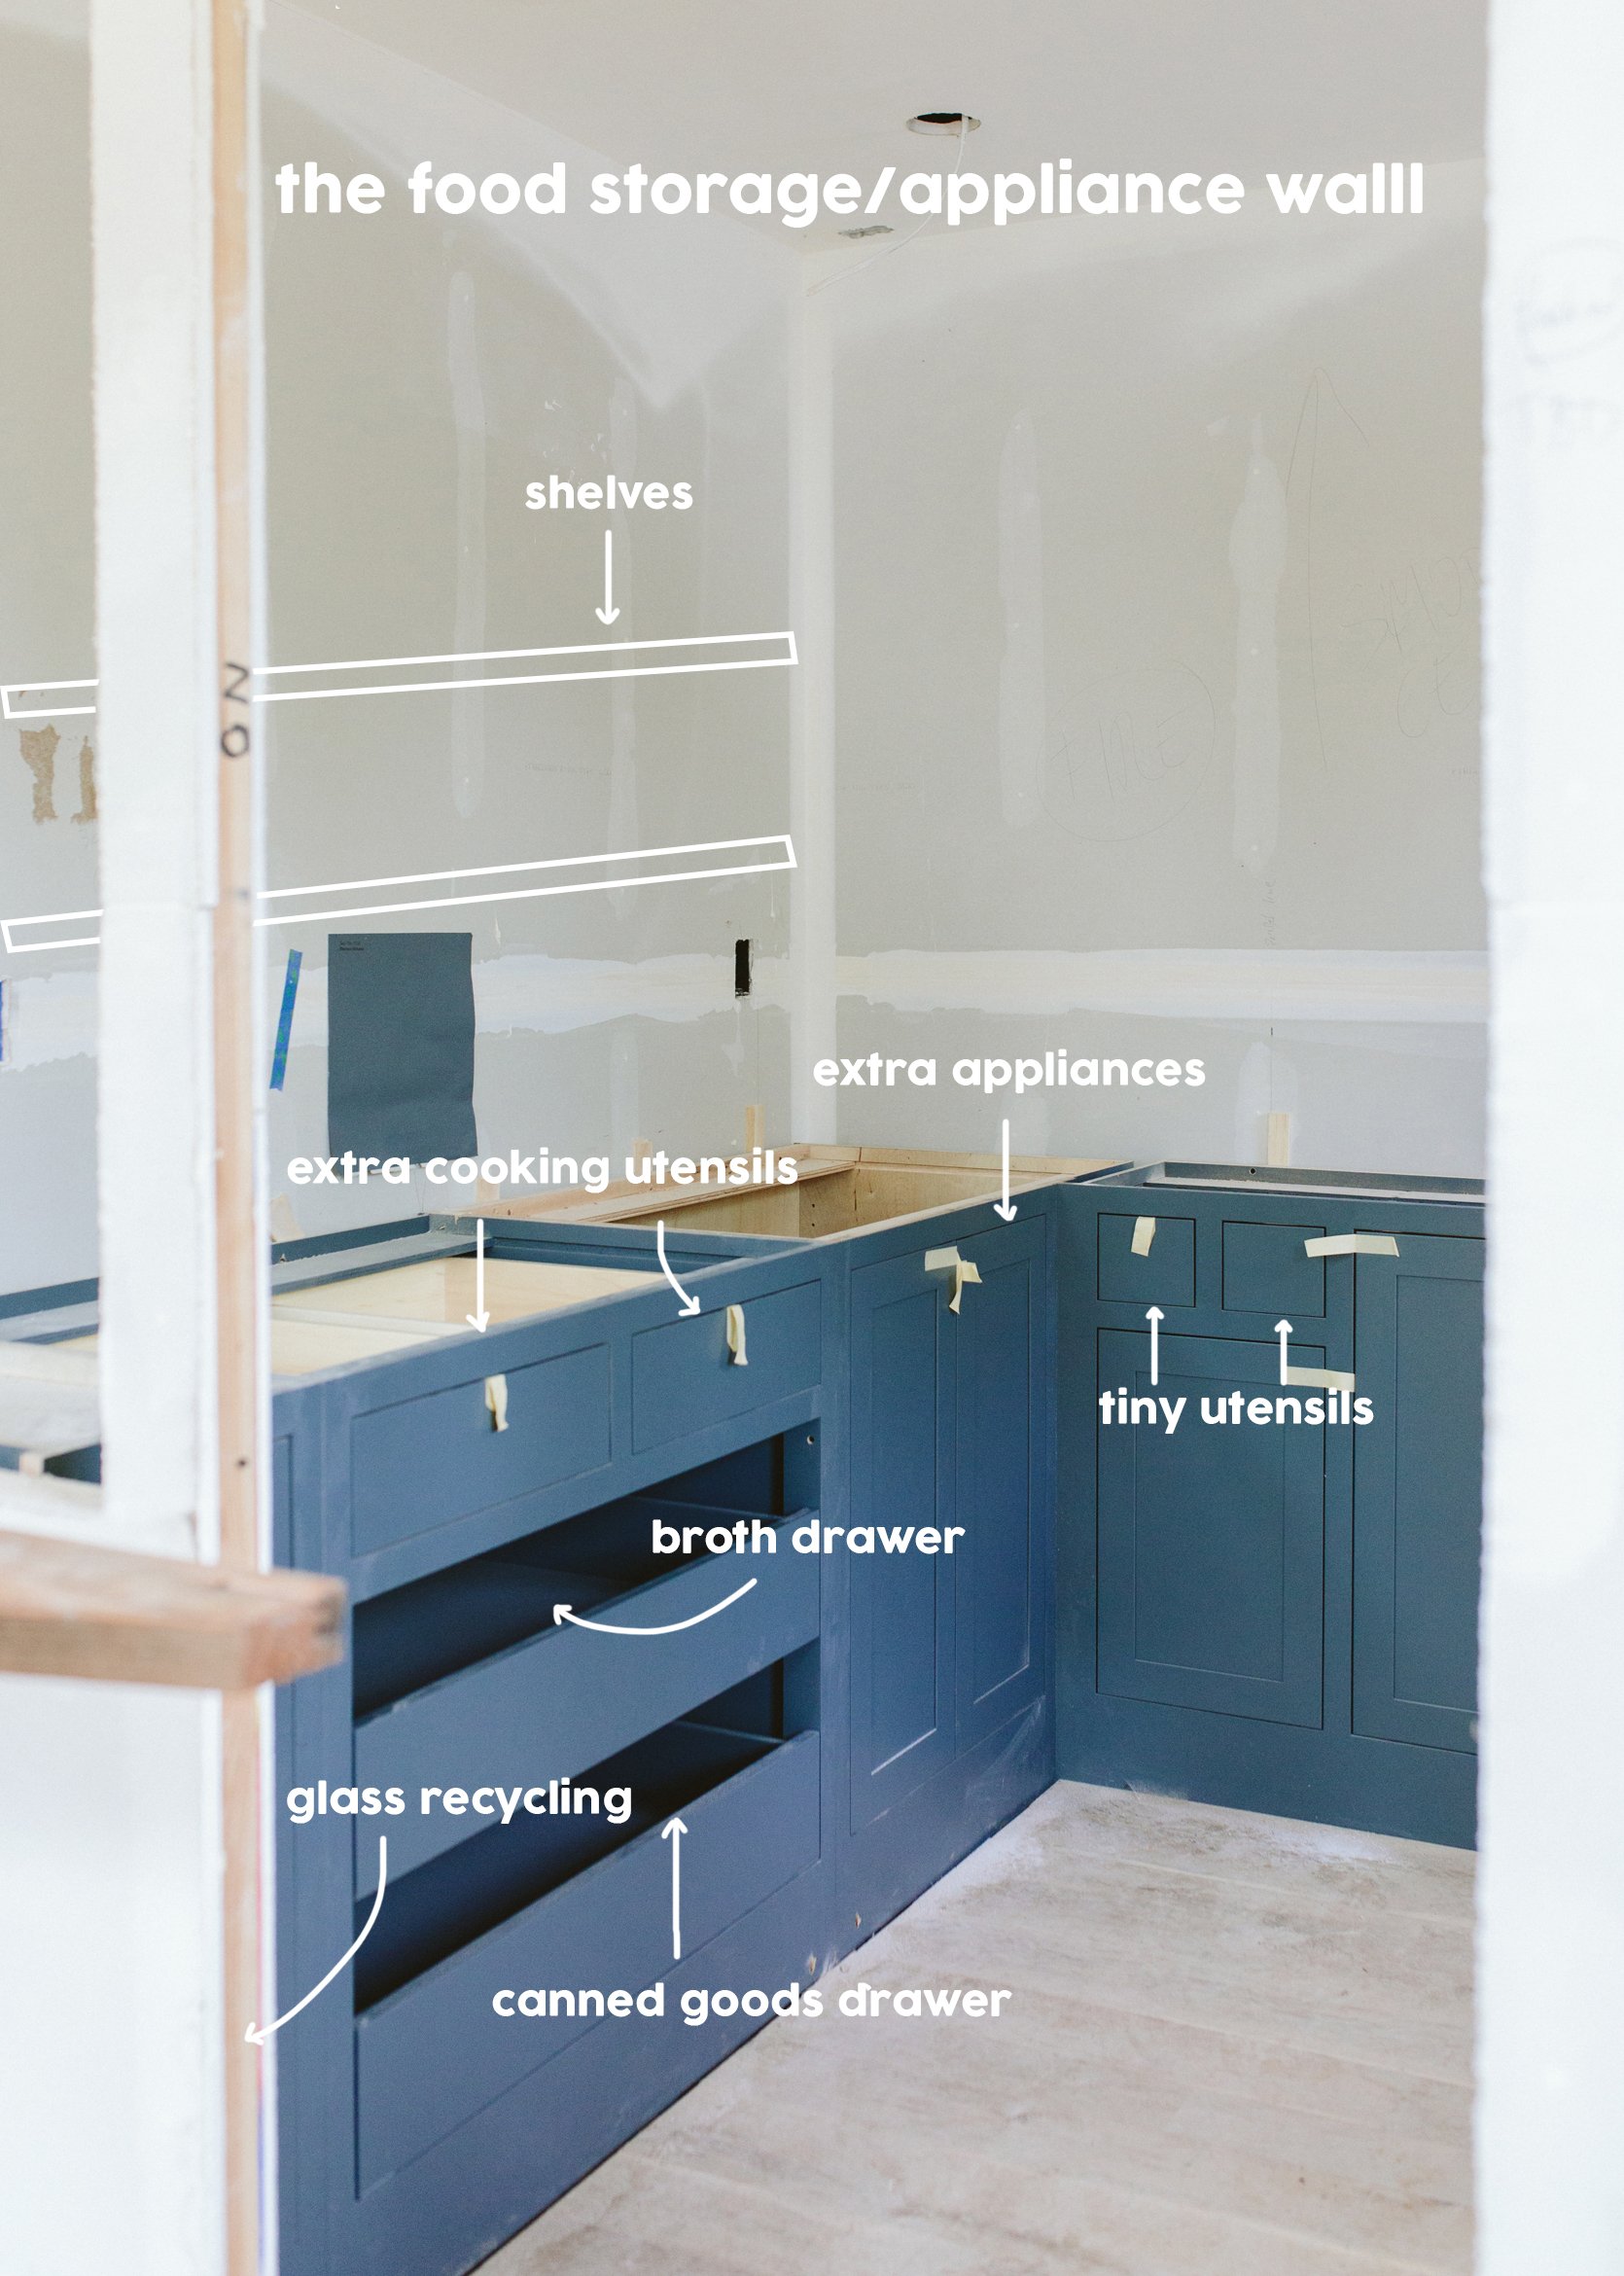
On the other side, we have 24″ deep cabinets that are a straight run so we have more opportunity to use it as a counter if needed (but likely won’t). The two pull-out drawers will house broth (measured the height to fit) and canned goods (all the heavy stuff) and we are putting really pretty hardware on it (stay tuned for that). The drawers above are likely for extra cooking utensils as they are more shallow. The far cabinet on the right will be for extra appliances with a pull-out lazy susan situation (I forget what it’s called) that will house our Instant Pot, bullet, etc. The two tiny drawers turned out smaller than I had imagined because since they are inset drawers the drawer mechanism is INSIDE those dimensions. It’s hilarious. They are so cute but not sure what to put in them. Paper Straws? Chopsticks? Salad Servers? Dunno.


What is happening above? What type of shelving??

First off, we have a really pretty horizontal large-scale bead board going up throughout the space that I can’t wait to show you. It’s gorgeous. We didn’t want upper cabinets in here as we didn’t want to hide the food that we need to grab, plus it would then just be a small room of cabinets. I fell in love with the monochromatic painted wood bracket look and that’s what we are doing.
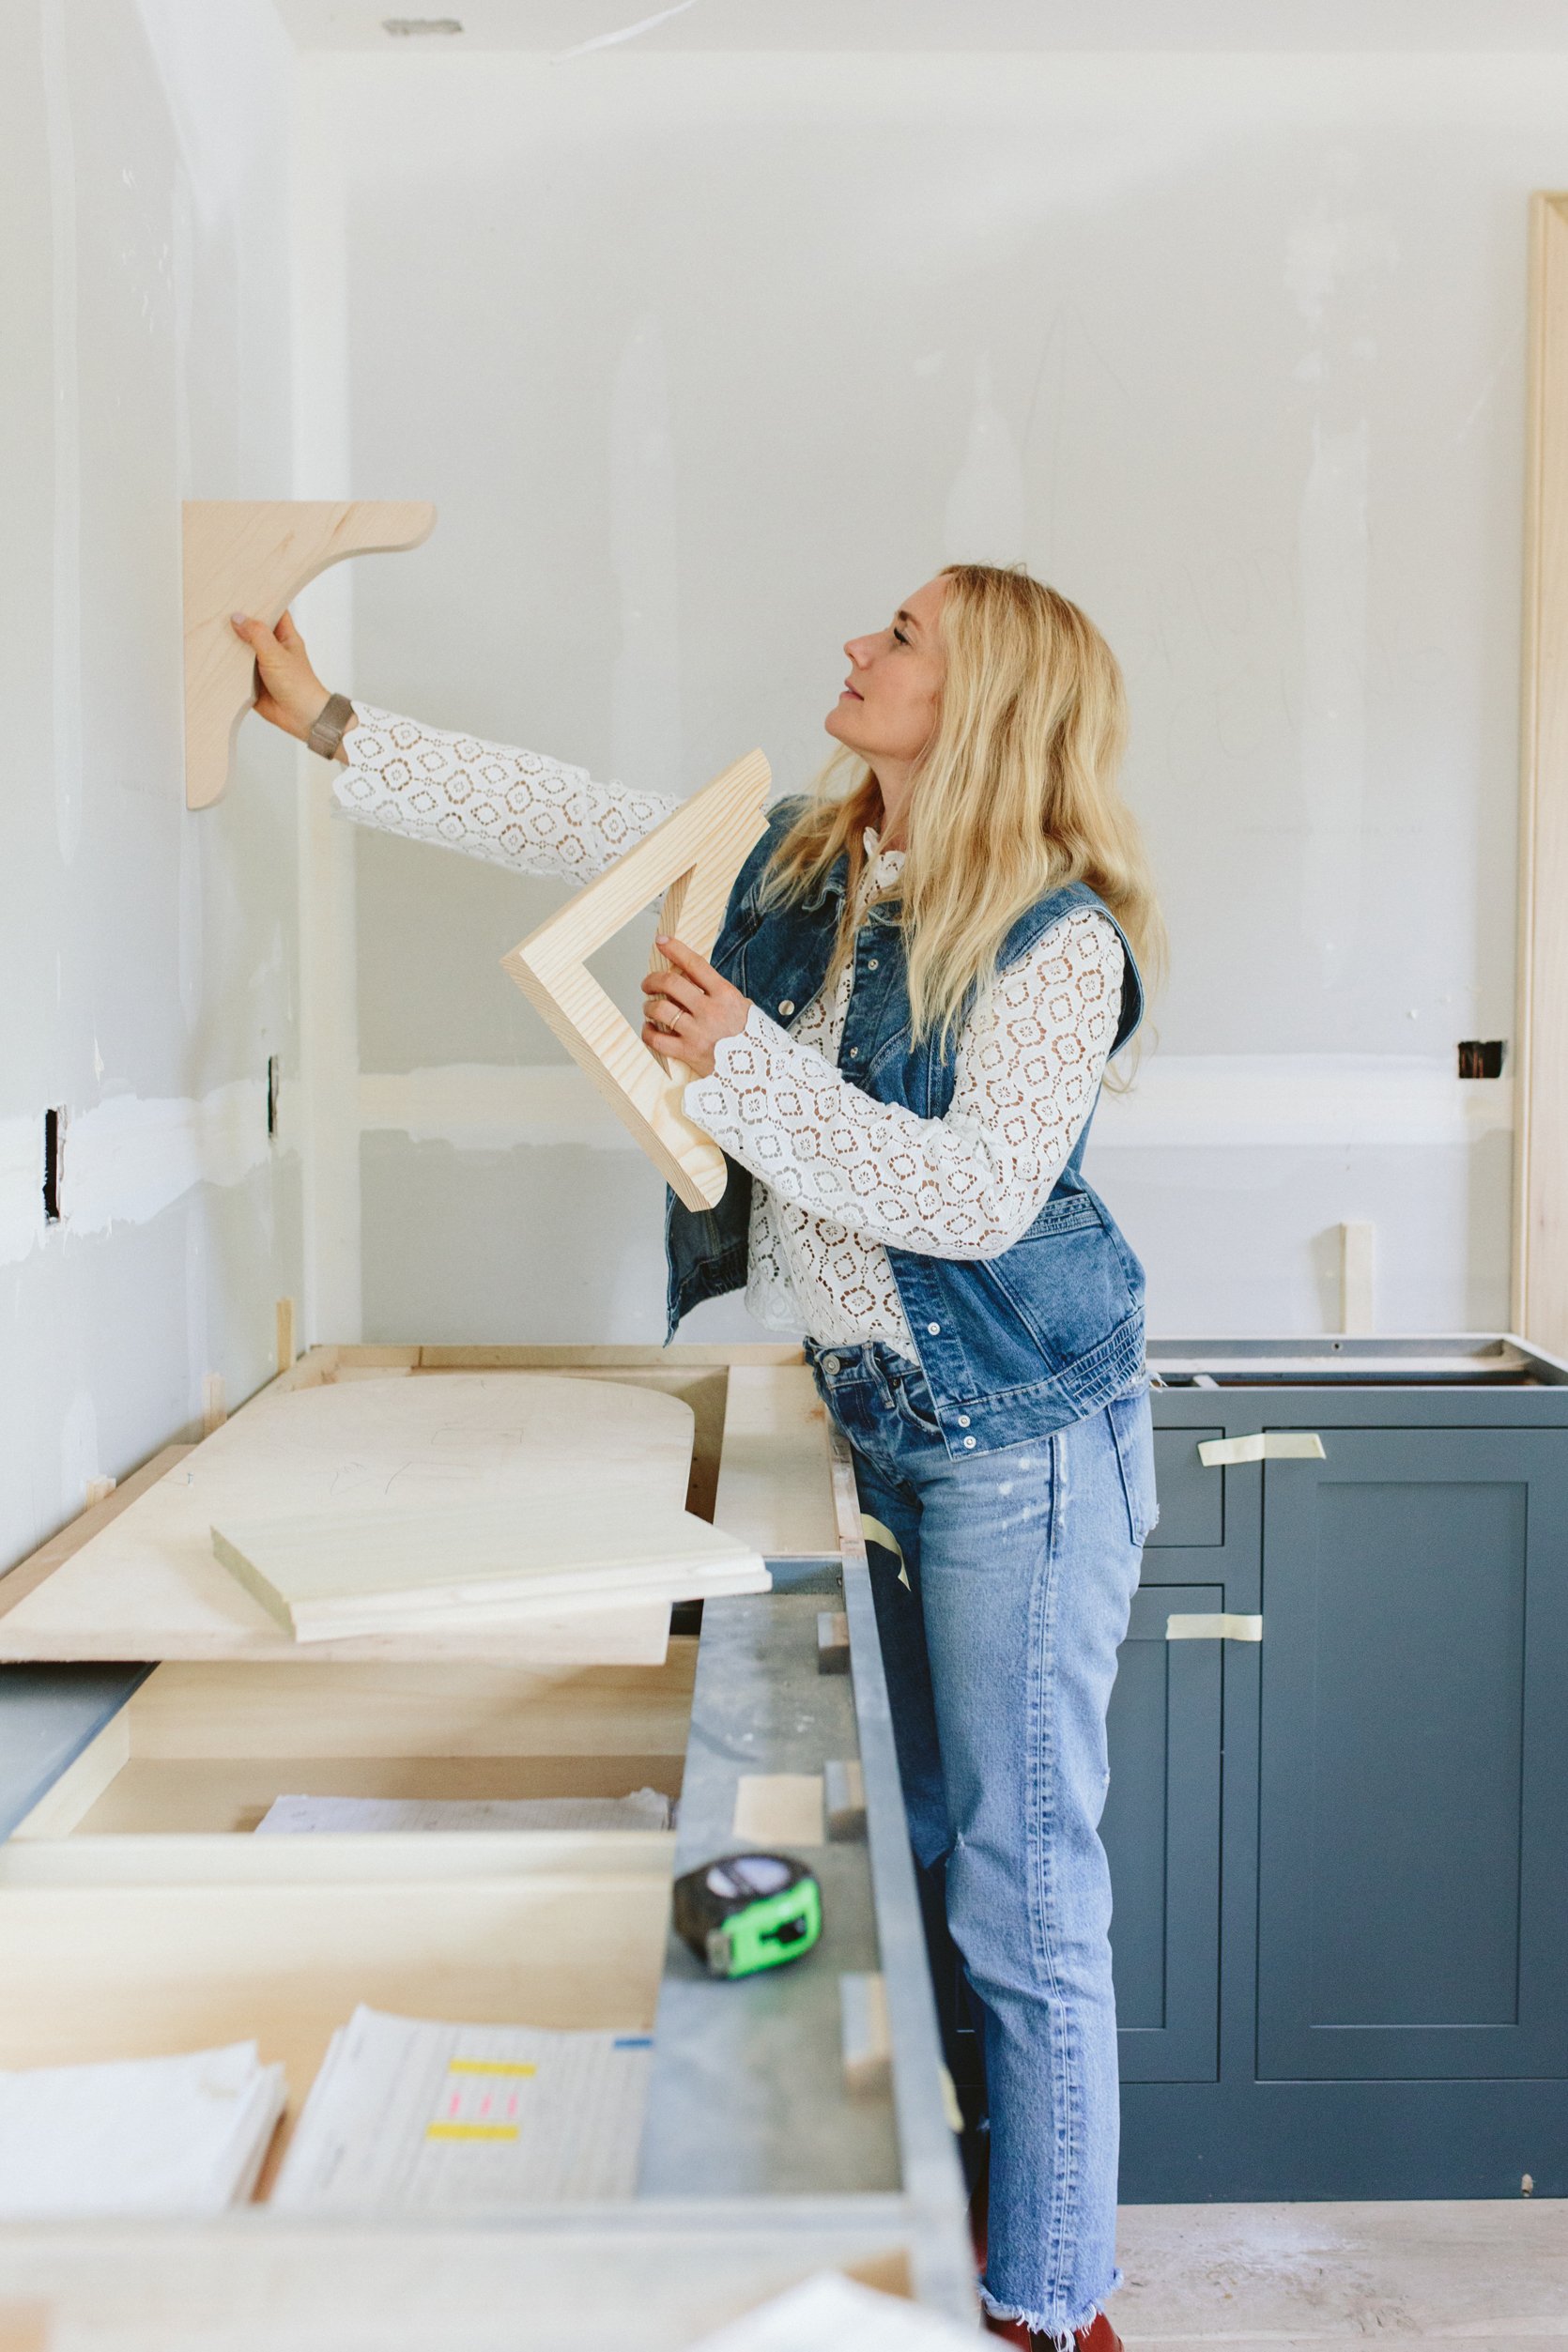
These look chunky right now but once painted out the color of the wall (still TBD) they’ll disappear a bit, plus we are getting smaller versions than what I’m holding here. We will also likely add some shaker pegs to hang baskets of garlic and onions. All the things. ALL THE THINGS.

These shelves will start about 22″ off the counter and be 12″ deep with a 10″ bracket for support – giving us counter space if desired. This is really the max depth you want as stuff behind it will get lost, but we wanted flexibility here so we went for 12″ (the same as the inside of upper cabinets). Since it’s running the length of the room (60″ or so) we are putting in 4 brackets to ensure it can hold whatever we put up there. Hopefully, this doesn’t look too busy but I really want to be able to put stacks of platters or jars of rocks if I want to. Maybe this is where I want to put my ankle weights. Who knows? Then there will be another shelf on top of that, 16″ above the top of the first one. So two shelves with pretty details that I’m excited to show you once we lock them down.

The Shallow Back Wall

This area is again only 16″ deep and it’s front and center walking into the pantry so I’m not totally sure what I’m going to put here. Here are the options floating around in my head:
- A hanging shaker cupboard on peg rail – maybe for extra sauces or ugly condiments?
- Plate rail for my pretty platters – Oh how I do love to show them off…
- Art, vintage mirror, or family calendar. This will also be a good mail drop zone so the smart mom in me would set it up for that. Now that I’m writing that maybe I should do the shaker cupboard but inside we have key hooks, checkbooks (??), pens, and then we drop the mail underneath? I may wait until after we move in to design this area (the shaker pegs can be screwed in at any time).
Pantry Countertop Material

I put off this decision for a LONG time. too long. So right before we left (the day that we shot) we had to pull the trigger. The options were:
- Leftover Carrera marble – the same material as the perimeter counters in the kitchen (it’s a really white carerra with a ton of negative space and warm and cool veining – from Bedrosians and gorgeous). We had just found out that we had enough leftover and it was already at the fabricators. This would be the easiest choice, but not necessarily the cheapest. Around $1500 for fabrication (I reckon this is on the more expensive side, FYI).
- Butcher Block – While working with Zena Flooring they told me that they are making custom countertops out of unfinished stainable maple. We liked the sample and were very tempted. They could deliver and have it cut on sight by our team (aka not as expensive as fabrication). Made in Oregon. Wonderful company. Affordable (unsure of the price but likely in the hundreds). We wouldn’t really prep or chop in there so it’d be more of a nice wood tone.
- A dark stone (yet to source, buy, or cut) – That’s right, a third option was what we really wanted which was a dark stone to make it moodier and to make and to be the most forgiving. The coffee area especially can get super messy and coffee is acidic, so I was very fearful that we would regret marble over there. But we could have put down a board under our serving area.

We chose #3. We were excited to lean into a dark pantry and loved the functionality of the granite. I could have gone any direction because they all had their pros and cons. Brian and Sarah pushed me into #3 which I was surprised by and appreciated their confidence. When Brian is willing to spend more on something he usually is right. He kept saying, “Emily this is your original vision, just do it”.
My Favorite Detail – The Vintage Windows

When I was sad, in the spring when the rain wouldn’t stop, I would look at the renderings of the pantry and the idea of those vintage windows flanking the opening flooded my brain with dopamine. I’m not joking. These vintage windows are pleasure-inducing and cheered me up when I was down (which is why I’m likely supposed to do this for a living). If you are just catching up, we took two of the original windows from the downstairs that we had to replace and flipped them vertically to fit here, flanking the doorway. We designed the pantry with these in mind. I’m so excited. The window in the back didn’t exist but we framed it in and bought a non-operable window from eBay for $200 that worked with the design. They will both be painted on the interior of the pantry in the same color as the paneling on the walls.
So that’s where we landed last week (as I was writing this post) and then on Friday they sent me updated photos where they finished the paneling, the stone, and the windows!! So more to come VERY VERY SOON.
Photography by Kaitlin Green
The post A Sneak Peek Into The Pantry Design Process (I’m So Excited I Could Cry) appeared first on Emily Henderson.


